✏️ Contributing To These Docs
You'll need to download two things:
- Obsidian to edit these pages.
- GitHub Desktop to download/upload changes.
Before getting started, you'll need a GitHub account and access to the repository.
- Create a GitHub account: Join GitHub · GitHub
- Send your GitHub account email address to Dakota.
Guide for those who are familiar with Git
The workflow is very simple:
- Clone the GitHub repository.
- Open the directory containing the repo files in Obsidian.
- Edit pages.
- Commit and push your changes.
The website will automatically build on any push, and your changes should be live within a minute or two.
Guide for those unfamiliar with Git
What is Git?
Git is a version control software that allows you to host a repository (repo) online. A repo is essentially just a collection of files that's hosted remotely.
These documents are hosted in a remote GitHub repository. When you want to make edits, you send your changes to the GitHub repo.
Cloning the repo
You can save your own local copy of these files to your computer (which is called cloning the repo).
This local copy on your computer is your copy of the repository. You can make any changes you want to it without those changes affecting the online version.
To clone the repo:
- Make sure you have GitHub Desktop installed (link above).
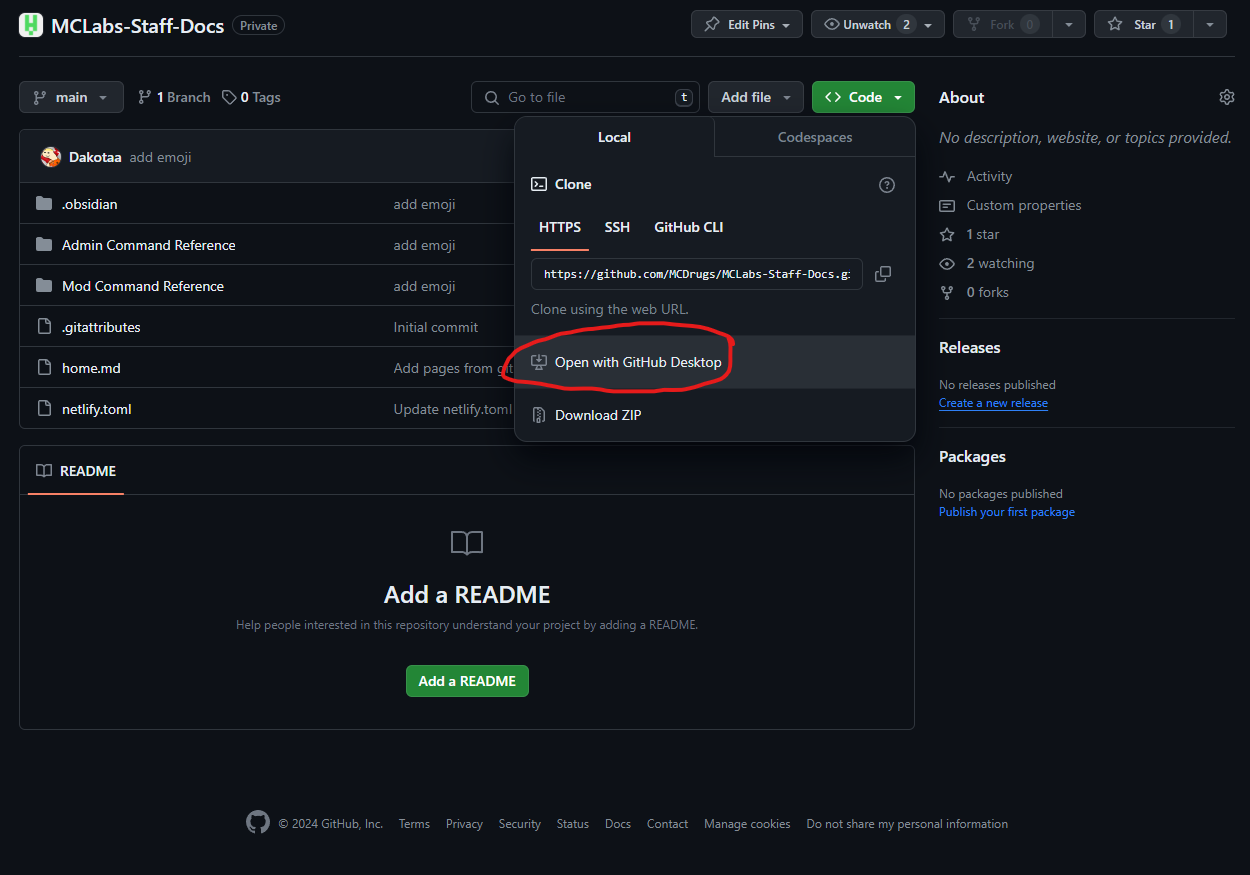
- Open the GitHub repository (you'll need access, see above).
- Click the green "Code" button, and then "Open with GitHub Desktop"
- GitHub desktop should prompt you to select a destination folder. Your "Documents" folder is a good place. Do so, and keep note of this folder.
Now that you have the repo files locally on your computer, you can edit them in Obsidian (download link above). Just open Obsidian, select "Open Folder as Vault", and select the folder that contains your local repo files (the one you selected in GitHub Desktop). This should these docs in an editable format in Obsidian, and you can now start writing.
Updating the repo with your work
Git can get pretty complicated, but for this you'll only need to know how to do three basic actions: Pull, commit, and push.
Once you've finished writing, your changes will be saved locally on your computer, but not on the live docs page. That's because the live page is linked to the remote repo. To get your changes there, you'll need to commit them and push them to the repo. But first, let's learn about pulling.
Pulling
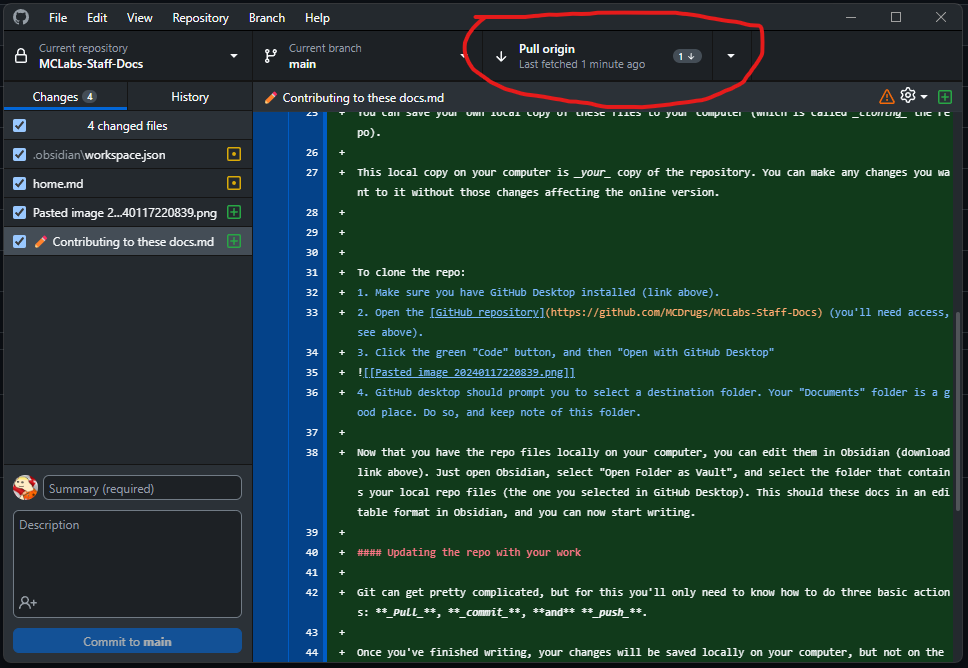
You'll want your version to be up-to-date with the online version. When a change is made to the online repo, you can update your local copy with these latest changes by pulling the repository. Think of this as pulling the changes from the online copy into your copy.
To pull from the remote repo in GitHub Desktop, click the "Fetch Origin" button in the top-right, and then "Pull origin", which should be in the same place.
Committing
Once you've made some changes to the files in your local copy of the repo, those files are different on your computer, but they're not actually in your local copy of the repo yet. To add the new files or update the changed files, you need to commit your changes.
Think of a commit as a snapshot of the changes you've made. When you make a commit, you give it a summary, and optionally a description. This info, along with your name and the files you changed, will show up in the git log, so other editors can see who made changes.
Commits should ideally be atomic, meaning they contain only the work for one change. For example, if you're adding two new pages, make a commit for each page. If you're making a bunch of unrelated changes, don't worry about making a bunch of commits. You'll be able to push them all at once.
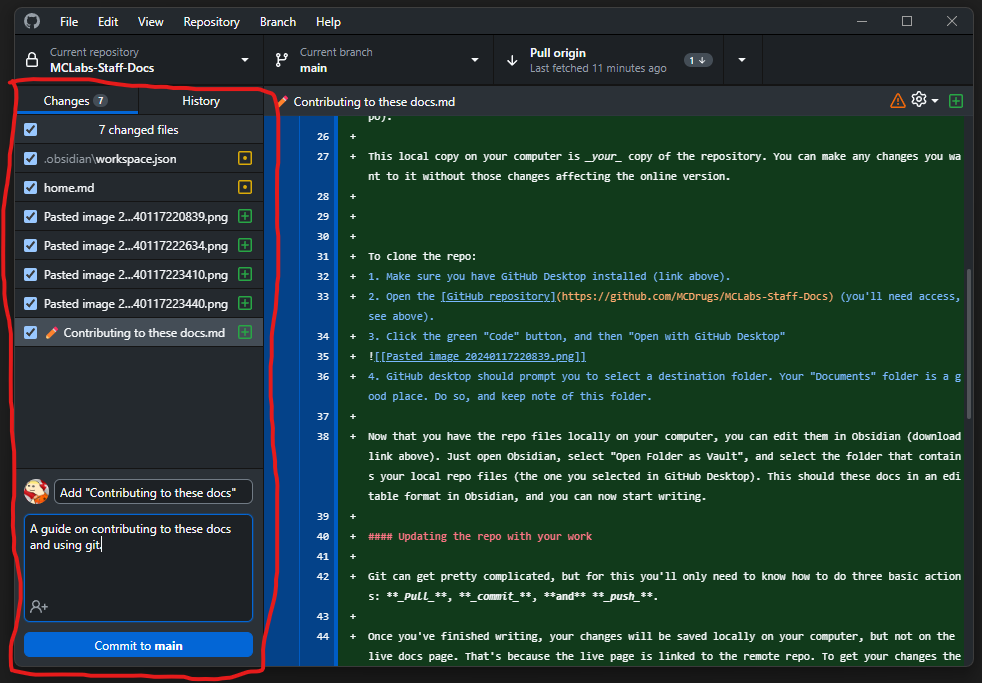
To make a commit in GitHub Desktop:
- Make sure you're on the "Changes" tab on the left side.
- Select the files you'd like to commit (often all of the changed ones)
- Write a summary and optionally a description (if a lot was changed and you need to say more). Try to keep the summary short.
- Press "Commit to main".
- Keep working and committing more, or push your commit.
Pushing
Users with permissions (which will be you if you decide to help with these docs) can push updates to the remote repo. This is like the opposite of pulling - you're updating the remote repo with the changes you've made to your local copy.
Once you've made one or more commits, you can push them to the remote repo. To do so, press the "Push Origin" button at the top-right (in the same place as the Pull button). You may need to pull first, if your local repo is out of date.
In some cases, you may run into a merge conflict. These usually aren't a big deal, but if it happens to you, talk to Dakota about resolving it.